Objective:
The objective of
this guide is to provide an overview of how to get started using the OpenBCI
UltraCortex MarkV with Cyton board right out of the box.
Step
1.) Open the
box(s) and set out your inventory of parts.
Step
2.) Follow the
on-line instructions for assembly.
Step
2a.) Should the
on-line instructions become unavailable basically the steps below
were followed:
-
Glue the 2 half's of the head set together using superglue (not
provided).
Instructions call for sanding
and cutting off excess from manufacture; however,
we had a clean fit
straight out of
the box. We did a dry fit, first, just to confirm.
-
Once the glue was dry (we gave it 24 hrs) we proceeded to screw in
the Cyton
board holder into
the rear of the UltraCortex (headset).
-
Twist and fit the electrodes into and space electrodes into place.
-
Wire up the electrodes and connect the recommended eletrodes into the
Cyton
board – See “Identify
electrode locations” section of assemby instructions.
If on-line
instructions are unavailable,
see Figure 1 below.
10_20_UltraCortex_DefaultLayout:
Figure
1.
-
Fit and attach the battery holder (we used the 4 A cell battery
holder &
attached using twisties,
in case it needs to be moved in the future).
Step
3.)
Download and install OpenBCI GUI software (if not already completed).
Step
4.) Install
Cyton USB Dongle into a USB port and install driver software, if
required- should install automatically.
Once ready the light on our Dongle turned solid blue.
Step
5.) Turn
on the Cyton board by moving slide switch from off position to the
BLE position. See
“Slide Switch” section of the Cyton hardware documentation.
Step
6.) Launch
OpenBCI Gui software application. Figure 2, below, represents the
Windows 64 bit version.
LaunchApplication:
Figure 2.
Step
7.) Execute
a quick system check by:
- Selecting “Live (from Cyton)”.
- Select the proper Com port.
- Open Radio Configuration and select “Status”.
“Success: System
is Up” should be displayed if
the system is fully operational.
SystemCheck:
Figure 3.
Step
8.) Once
an operational system is confirmed select “Start System” to
launch the Brainwave monitoring application.
StartSystem:
Figure 4.
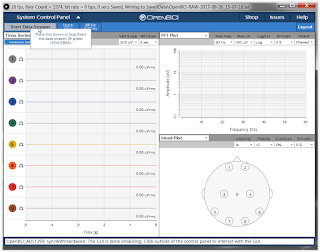
Step 9.) Click the “Start Data Stream” button to begin brain wave observations and adjust or customize the panels according to your specific needs.
StartDataStream:
Figure 5.
Step
10.) Begin
observation of live brain activity.
ObserveBrainAvtivity:
Figure 6.
Appenidx
A.) Exit the system:
Step
1.) Select
the “Stop Data Stream” button
StopDataStream:
Figure A-1.
Step
2.) From
the Control Panel, select “Stop System” then close the
application.
StopSystem:
Figure A-2.
CloseApp:
Figure A-3.


