Thursday, May 31, 2018

BCI: Compare 8 to 16 channel 10-20 electrode coverage


Purpose: The purpose of this document is to demonstrate the differences in monitoring coverage when increasing the number of electrodes of the UltraCortex Mark IV from 8 to 16 then re-configuring the software to receive input from the expansion. The end result being denser coverage with an increase in reading sensitivity from brain wave activity. Again the study is not meant to be of scientific or medical origin but rather to highlight/compare the outcome resulting from an increase of 8 additional channels.

Study Examples:


8 ChannelTest subject at rest sitting in a chair with little to no physical activity other then an occasional eye blink.


16 ChannelTest subject at rest sitting in a chair with little to no physical activity other then an occasional eye blink.


Friday, March 2, 2018

Human Brain Monitoring / Machine Learning Study

Purpose: The purpose of this document is to show the interoperability of the OpenBCI hardware and software in action while monitoring human brain activity.

Please note the examples, below, are not meant to depict a scientific or medical study. This especially applies to the alcohol study, which would normally be considered a contaminated study; however, the results were too interesting not to include. 

They are meant to outline the system in actual use while showing a resulting difference in brain activity detected by the system (e.g. machine learning) during the monitoring session of a test subject under different conditions. In addition, these studies also highlight the recorded playback feature of the software and integration with other third party software. 


Study Examples:

At Rest Study: Test subject at rest sitting in a chair with little to no physical activity other then an occasional eye blink.


The video speed has been increased by 2 for presentation purposes.


Alcohol StudyThe same test subject at a different day/time sitting in a chair with little to no physical activity, except the occasional eye blink. Test subject is under the influence of alcohol.

                                          The video speed has been increased by 2 for presentation purposes.


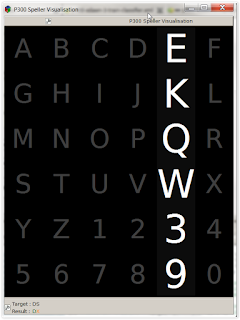
Brain Influence: Test subject at rest sitting in a chair with little to no physical activity other then an occasional eye blink. This study example depicts brainwaves from a test subject being sent to a computer and interfaced with third party software in order to influence the computer to spell pre-determined letters using only mental focus and thought. Using the third party P300 Speller software, 2 letters are defined and the test subject focuses on each letter, while watching the screen, and envisions the letters being spelled by the computer in order to influence the outcome.

 
The video speed has been increased by 2 for presentation purposes.


Friday, October 6, 2017

OpenBCI Ultra Cortex Quick Start Guide (HMI)

Objective: The objective of this guide is to provide an overview of how to get started using the OpenBCI UltraCortex MarkV with Cyton board right out of the box.

Step 1.) Open the box(s) and set out your inventory of parts.

Step 2.) Follow the on-line instructions for assembly.

Step 2a.) Should the on-line instructions become unavailable basically the steps below 
                were followed:
               - Glue the 2 half's of the head set together using superglue (not provided). 
                 Instructions call for sanding and cutting off excess from manufacture; however, 
                 we had a clean fit straight out of the box. We did a dry fit, first, just to confirm.
               - Once the glue was dry (we gave it 24 hrs) we proceeded to screw in the Cyton 
                 board holder into the rear of the UltraCortex (headset).
               - Twist and fit the electrodes into and space electrodes into place.
               - Wire up the electrodes and connect the recommended eletrodes into the Cyton 
                  board – See Identify electrode locations” section of assemby instructions. 
                  If on-line instructions are unavailable, see Figure 1 below.
10_20_UltraCortex_DefaultLayout:

                                                                                                  Figure 1.

                - Fit and attach the battery holder (we used the 4 A cell battery holder & 
                  attached using twisties, in case it needs to be moved in the future).

Step 3.) Download and install OpenBCI GUI software (if not already completed).

Step 4.) Install Cyton USB Dongle into a USB port and install driver software, if required- should install automatically. Once ready the light on our Dongle turned solid blue.

Step 5.) Turn on the Cyton board by moving slide switch from off position to the BLE position. See “Slide Switch” section of the Cyton hardware documentation.

Step 6.) Launch OpenBCI Gui software application. Figure 2, below, represents the Windows 64 bit version.
LaunchApplication:

                                                                                                  Figure 2.

Step 7.) Execute a quick system check by:
- Selecting “Live (from Cyton)”.
- Select the proper Com port.
- Open Radio Configuration and select “Status”. 
  “Success: System is Up” should be displayed if the system is fully operational.
SystemCheck:

                                                                                                  Figure 3.
Step 8.) Once an operational system is confirmed select “Start System” to launch the Brainwave monitoring application.
StartSystem:

                                                                                                  Figure 4.


 Step 9.) Click the “Start Data Stream” button to begin brain wave observations and adjust or customize the panels according to your specific needs.
StartDataStream:    

                                                                                                  Figure 5.

Step 10.) Begin observation of live brain activity.
ObserveBrainAvtivity:

                                                                                                  Figure 6.

Appenidx A.) Exit the system:

Step 1.) Select the “Stop Data Stream” button
StopDataStream:

                                                                                                  Figure A-1.

Step 2.) From the Control Panel, select “Stop System” then close the application.
StopSystem:

                                                                                                  Figure A-2.

CloseApp:

                                                                                                  Figure A-3.

Wednesday, September 13, 2017

OpenBCI / P300 Speller Integration Quick Start Guide (HMI)

Objective: The objective of this guide is to provide an overview of the steps used to get an OpenBCI UltraCortex with embedded Cyton board properly integrated with the Openvibe P300 Speller software. It is not meant to be a comprehensive guide but just enough to get anyone (just getting started) pointed in the right direction. Time permitting, in the future, a more detailed guide may replace this one or be added.

Step1.) Download and install P300 speller application by Openvibe.
Note: Where ever the program installs permissions will need to be adjusted to allow add, update deletion of log files.

Step 2.) Attain the proper electrode position layout & relocate electrodes and re-wire to Cyton board.
10_20_System:
                                                                                                  Figure 1.
Note: The numbers in red 1-8 in figure above.
Step 3.) Plug the Cyton Dongle into a USB port.

Step 4.) Power on the Cyton board.

Step 5.) Launch the Openvibe Acquisition Server program and configure a proper driver and confirm connection.
Note: Driver Properties set to Automatic, change channel names per figure 1 above (1-8), 1 being C3.
AcqServConnect:
                                                                                                   Figure 2.
AcqSrvPlay:
                                                                                                   Figure 3.
ChannelNamesAdj:
                                                                                                   Figure 4.
 Note: Found under the "Driver Properties" button.

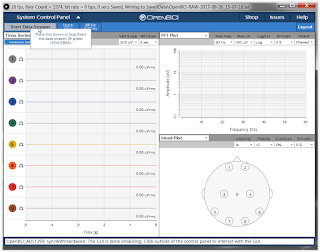
Step 6.) Launch the Openvibe Designer program & launch the signal-monitoring utility. This is used to confirm brain signal's are actively being received from each electrode (we left this running to ensure we could confirm brain signals at any time).
Note: During our initial experiment we used:
<InstallLocation>\share\openvibe\scenarios\bci-examples\p300-speller-xDAWN\p300-xdawn-0-signal-monitoring.xml.

SigMonLaunch:
                                                                                                    Figure 5.

SigMonPlay:
                                                                                                    Figure 6.

SigMonChannels:
                                                                                                     Figure 7.

Step 6a.) Adjust to only the channels defined from the Note in Step 5, figure 4.
SigMonAdj:
                                                                                                      Figure 8.
SelectChannels:
                                                                                                      Figure 9.
Highlight_onlyChannelsWanted:
                                                                                              Figure 10.     
   
Step 6b.) Observe the signal channel's now being monitored.
SignalMonitoring:
                                                                                                     Figure 11.

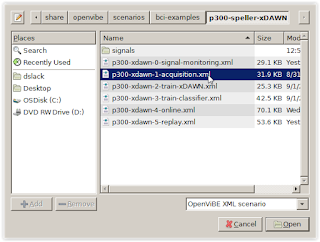
Step 7.) Launch the Acquisition program (p300-xdawn-1-acquisition.xml). Once we had a good training file (where the results where above 85%) we proceeded.
Note: At the conclusion of each exercise a log file was written to the following location:
<InstallLocation>\share\openvibe\scenarios\bci-examples\p300-speller-xDAWN\signals\

Acquisition_XML:
                                                                                                      Figure 12.

Step 8.) Launch the Training program (p300-xdawn-2-train-xDAWN.xml) and point the program to use the best percentage result Acquisition results file possible. We then used the fast forward selection to quick process the file results, be patient & watch the lower console window.
Note: This is where a detected error prompted the alternation of user file/folder permissions.

Train_XML:
                                                                                                       Figure 13.

AccuTargFile:
                                                                                                      Figure 14.
Note: to select and change double click “Generic stream reader” on XML panel page, shown above.

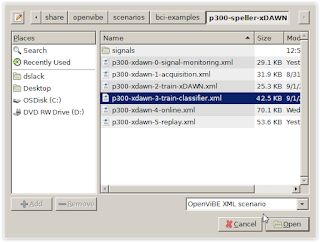
Step 9.) Launch the Classifier program (p300-xdawn-3-train-classifier.xml) and point the program to use the best percentage result Acquisition results file possible (using the same method as in the previous step). We then used the fast forward selection to quick process the file results- which will show the percentage results, be patient & watch the lower console window.
Note: This is where a detected error prompted the alternation of user file/folder permissions.

Classifier_XML:
                                                                                                      Figure 15.

Step 10.) Launch the Online program (p300-xdawn-4-online.xml) to begin using the P300 speller program to actually begin spelling letters using a test subject's brain. The program will show a source letter at a time (in blue), go through it's gyrations then show the resulting letter your brain should have focused on (in green).
Note: the source and resulting letters are depicted at the bottom left of the screen.

Online_XML:
                                                                                                     Figure 16.
AcqSrv02:

                                                                                                   Figure 17.

Human Brain Computing Interface Technology Acquisition Review (HMI)

Objective:
The purpose of this document is to outline our experience with OpenBCI for review by others curious about this offering.

Experiences:
Website: Easy to navigate around.

http://openbci.com

Information/documentation look-up was fairly easy just a little slow awaiting Wordpress processing. Ordering was surprisingly simple and an order/charge confirmation was quickly sent as well as notices for shipping (with tracking numbers).

Software: download was simple as well as installation and very much has an Open-source feel to it (meaning with Windows it does not have an MSI installer and just opens within the sub-directory it is uncompressed to). Upon launching the application, as expected, the anti-virus complained but after re-configuring the anti-virus software to accept the application this issue went away. We also scanned the software download, prior to install, to ensure the download didn't contain anything nefarious.
We also downloaded a brain to text software from OpenVibe under GNU public free license in order to evaluate combined ability to type text to a computer using the Ultracortex/Cyton as an interface between the human brain and computer. The Openvibe software used an msi installer and installed without issue, of course, we also did an anti-virus check on it once downloaded.

Forum: We inquired to the Forum about the proper sizing of the head-gear. We received a response within 15 minutes but the reply required further clarification (which gave more specifications along with the word “should” fit and a recommendation to contact OpeBCI directly). We also noticed a piggy back board (for the Cyton) that could increase its capability to 16 channels and at additional $400 investment. We are hopeful that this piggy back channel extension board can be acquired separately in the future; however, there was no option for this type purchase- we will inquire at a later date after it is determined that the technology works as depicted.

Ordering: We ordered the Ultra-cortex Mark IV-16 with Cyton board on Monday and anticipated delivery by end of day Saturday. The order arrived as scheduled and in perfect shape.

Construction: Everything went together as instructed, had to search around a little with Google, for clarity/pictures, some of the links on the OpenBCI page were broken and wiring the Cyton board was a little vague- but we were able to figure it out.
We pre-downloaded and installed the OpenBCI software and installed the required drivers (including an update to the dongle itself) as instructed. There was an issue on a Windows 7 32-bit system where the OpenBCI Gui software will launch but the Gui never finishes loading (will need to re-visit, could be Virus software related). The Windows 7 64-bit system installed and operated as documented. We experienced intermittent issues communicating to the Com port and RF communication between the dongle and the Cyton board; however, the issue ended up being interference from a wireless mouse (once turned off we could move the dongle around to any of my USB ports (usb 2 or 3) and the system consistently worked. During research and troubleshooting we noted a recommendation to update the Com port Latency setting from the default of 16ms to 1 ms (this was done and we noted quicker brain scan channel graph results).

Warranty: Based on our intermittent issues we reviewed the warranty with OpenBCI and it was covered within the first 30 day's but at their sole discretion of replacement (not necessary a refund) and with no RMA policy the return shipping was left up to the customer. Provided everything works- great, but if you have to send something back for re-test/repair in the first 30 day's plan for added expense. I contact sales@openbci.com and were very helpful and quickly gave me an address and a primary contact. Fortunately our issue ended up being wireless mouse interference and we did not have to return anything.

End Result: It took longer then the advertised 30 seconds to be up an running; however, once we finished building (we chose the un-assembled option) and resolved the interference issue we were able to turn everything on, start the software, deploy the Ultra-cortex to a test subject with ear clips and begin brain wave monitoring and observation (as shown in their video presentation).


Friday, July 15, 2016

Install CentOS 6.x using Net-Install method

Purpose: The purpose of this document is to outline the basic step to installing CentOS 6.x using the Net-Install method. It is not meant to be comprehensive but rather enough information to complete the basic tasks, some previous Linux knowledge is recommended.

Step 1.) Downloaded Centos netinstall file and burned to CD and verified.

Step 2.) Rebooted blank system with newly created CD in it answered a few basic questions and told it to use DHCP and it began the install.

Step 3.) Pointed to URL (note 32 or 64 bit system):
Http://mirror.centos.org/centos/6/os/i386

Step 4.) Acquire OS updates for the system (from a system command prompt once install complete):
yum update

Note (additional commands):
To update a specific package:
yum update packagename (e.g. yum update httpd)

List updates with:
yum list updates

Listing whats installed:
yum list installed or yum list installed httpd, ect. Or
rpm -qa | less (works better)

To remove a package:
yum remove httpd

Step 5.) To install an X-windows (I preferred KDE to GNOME):
yum groupinstall "X Window System"
yum groupinstall “KDE Desktop”

If you prefer GNOME then:
yum groupinstall "GNOME Desktop Environment"

Note: Only install a single desktop environment (either KDE or GNOME) otherwise additional re-configurations will be required.

Step 6.) To make changes to your network configurations (edit file):
/etc/sysconfig/network-scripts/ifcfg-eth0

Other network related file (where hostname and gateway can be defined):
/etc/sysconfig/network

with syntax:
NETWORKING=yes
HOSTNAME=your.hostname.com
GATEWAY=xxx.xxx.xxx.xxx


                                                                                                                                                                                                                                                                                           Slack Consulting 06.2012

Thursday, July 14, 2016

Activate SNMP on VMWare ESXi host

Purpose: This document will outline the steps required to turn on SNMP within a VMWare ESXi host when it is being managed from an Vcenter Server system. This will allow an ESXi hosts to respond to SNMP queries from an SNMP management system.

Source and target system versions (may also work with other ESXi versions):
vCenter Server v5.5
ESXi v5.x

Step 1.) Open command prompt on vCenter Server system and change to the following directory:
C:\Program Files (x86)\VMware\VMware vSphere CLI or equivalent path to the VMware vSphere CLI directory (depends where program was installed).

Step 2.) Setup community string using following syntax format:
vicfg-snmp.pl --server hostname --username username --password password -c com1

e.g.- vicfg-snmp.pl --server server123 --username ChooseMe --password ChangeMe -c YourUniqueString

Step 3.) Set up for polling using following syntax format:
vicfg-snmp.pl --server hostname --username username --password password -p port

e.g.- vicfg-snmp.pl --server server123 --username ChooseMe --password ChangeMe -p 161

Step 4.) Enable SNMP on the host using following syntax format:
vicfg-snmp.pl --server hostname --username username --password password --enable

e.g.- vicfg-snmp.pl --server server123 --username ChooseMe --password ChangeMe –enable


                                                                                                                                                                                                                                                                                           Slack Consulting 05.2014